How to Use?
Laces that meet YOUR NEEDS
Straight Bar
Crisscross
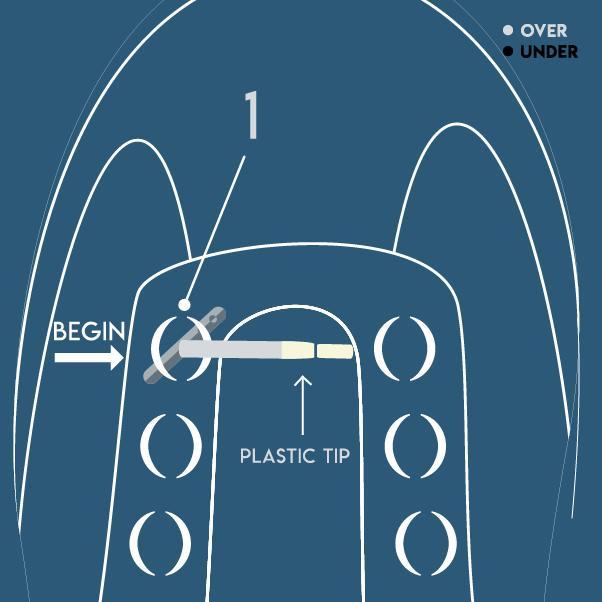
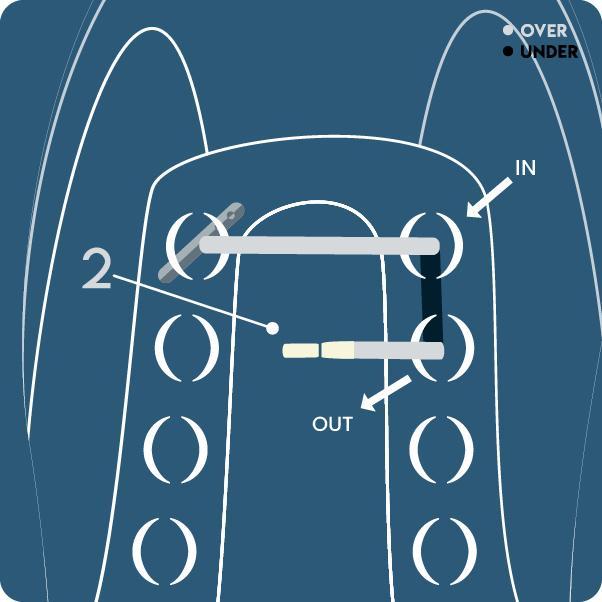
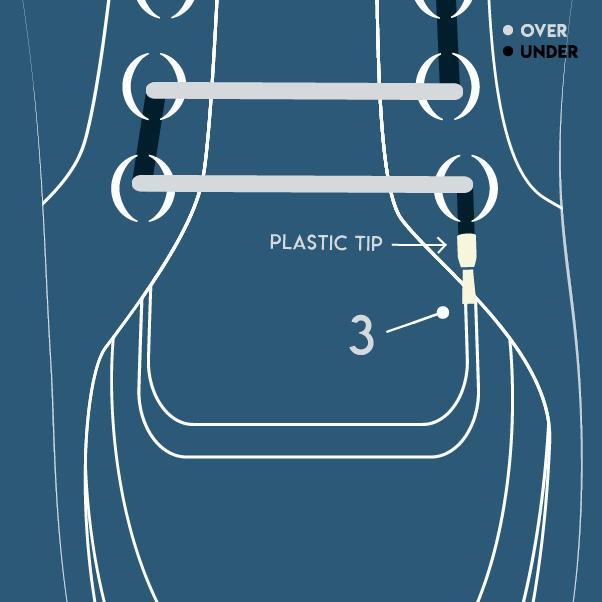
Straight Bar lacing guide
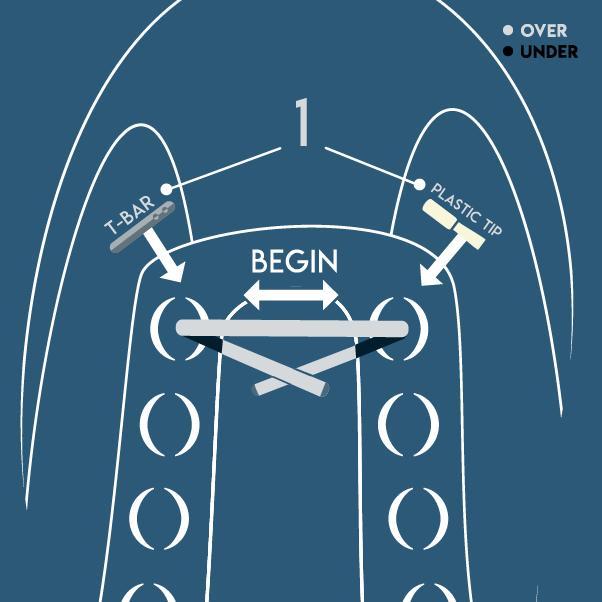
Step 1
Start from the bottom of the shoe tongue (near the toe). Then, pull the plastic tip up through the eyelet from inside the shoe while securing the T-bar under it
Step 2
Next, put the plastic tip in the adjacent eyelet and pull it out from the eyelet below it
Step 3
Repeat the Straight threading pattern until you put the plastic tip in the last eyelet
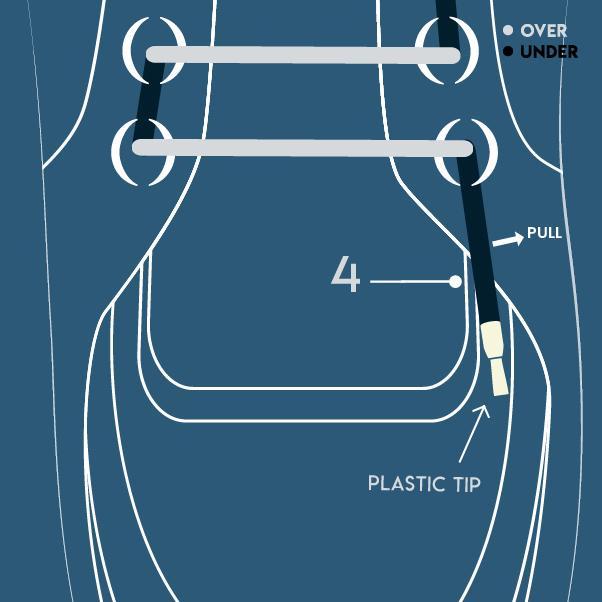
Step 4
Insert foot and check for desired tension while pulling out the slack away from the T-bar (one row at a time). Move the foot up the shoe until reaching the plastic tip
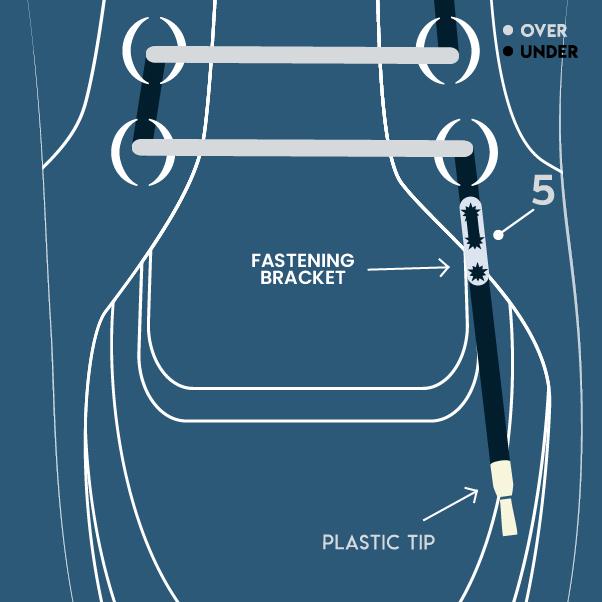
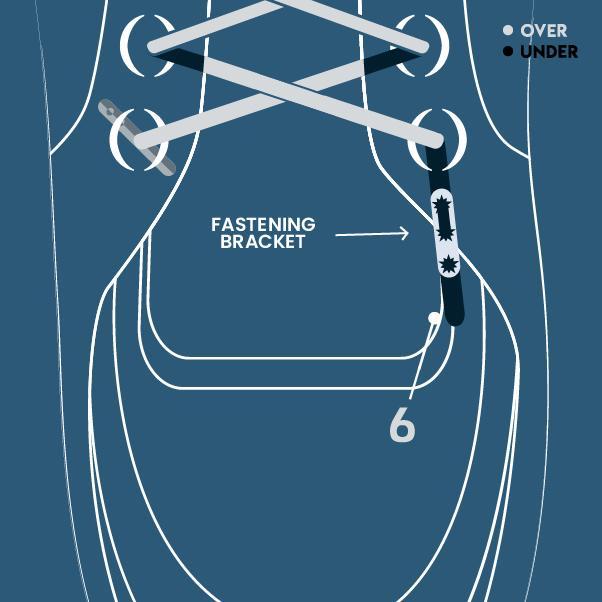
Step 5
Now, install the Fastening Bracket by weaving the lace through it. Then secure the bracket directly against the inside of the shoe
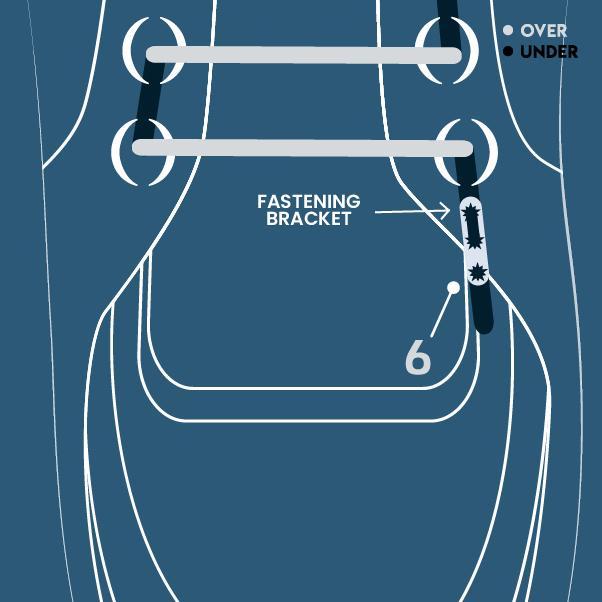
Step 6
Lastly, adjust the tightness as needed until you find your perfect fit before trimming off excess lace (leave 1” for good measures)
Pro Moves
✂️ Leave an extra inch of lace while trimming:
Wear your shoes for a few hours or days, and then cut the excess lace to secure the perfect custom fit for your shoes.
Wear your shoes for a few hours or days, and then cut the excess lace to secure the perfect custom fit for your shoes.
🔥 Burn the end tip of the lace, under the fastening bracket:
This will prevent the laces from fraying and make them more suitable for washing.
Crisscross lacing guide
Step 1
Starting from the bottom of the shoe tongue, insert the ends of the plastic tip and T-bar into opposite eyelets and pull each one out from below
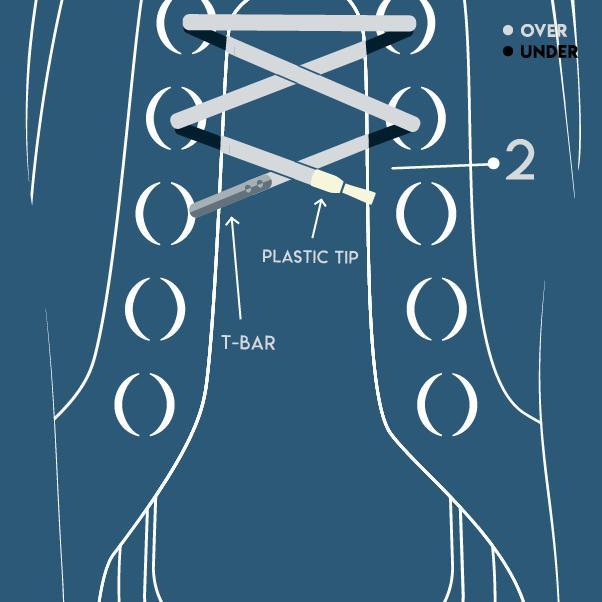
Step 2
Now, diagonally push the plastic tip down the next eyelet from above and do the same for the T-bar as well, thus creating a Criss Cross style
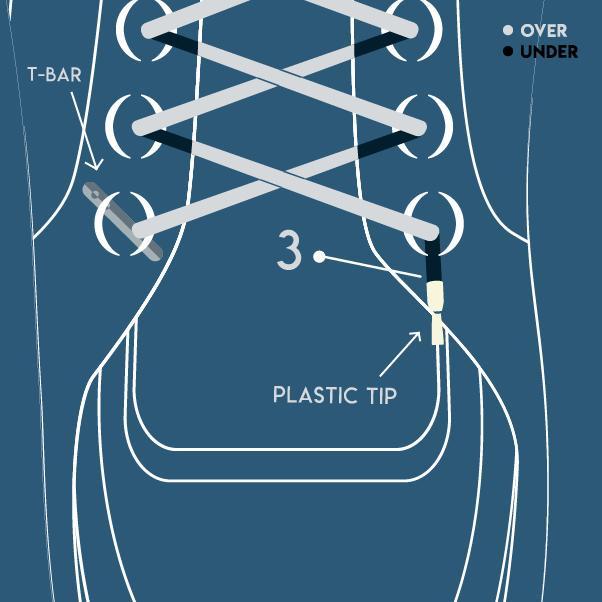
Step 3
Repeat the Criss Cross threading pattern until you reach the last row of eyelets
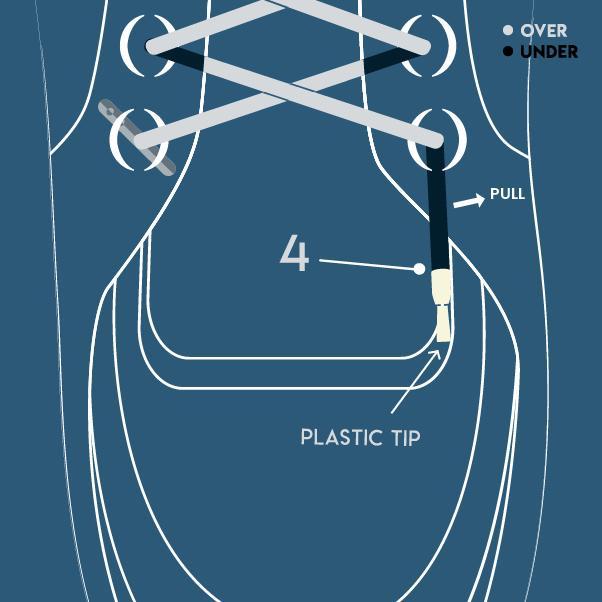
Step 4
Insert foot and check for desired tension while pulling out the slack away from the T-bar. Move down the shoe towards the toe-end and then back up towards the heel-end
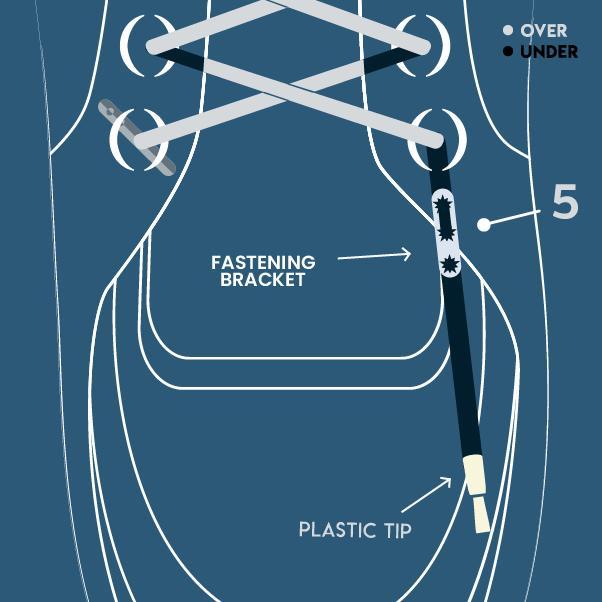
Step 5
Now, install the Fastening Bracket on the plastic tip end by weaving the lace through it. Then secure the bracket directly against the inside of the shoe
Step 6
Lastly, insert your foot, adjust the tightness as needed until you find your perfect fit before trimming off excess lace (leave 1” for good measures)
Pro Moves
✂️ Leave an extra inch of lace while trimming: Wear your shoes for a few hours or days, and then cut the excess lace to secure the perfect custom fit for your shoes.
🔥 Burn the end tip of the lace, under the fastening bracket:
This will prevent the laces from fraying and make them more suitable for washing.
How To use No-Tie Elastic Shoelaces
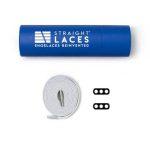
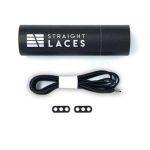
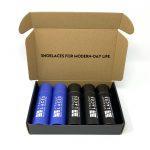
Getting To Know Straight Laces
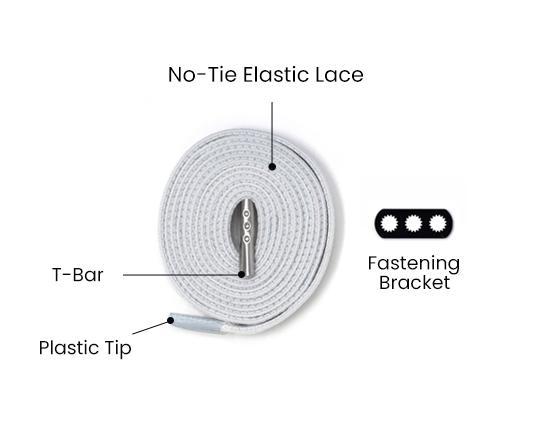
Each tube contains a pair of No-Tie Elastic Shoelaces with T-Bars and two Fastening Brackets:
1 – No-Tie Elastic Shoelace: provides the perfect stretch while keeping a secure fit around your foot.
2 – Fastening Bracket: holds the lace’s tension and maintains the custom fit.
3 – T-Bar: sleekly secures one end of our no-tie lace to your shoe.
4 – Plastic Tip: allows the other end of the lace to be easily woven through the Fastening Bracket.
Why Do I Need Straight Laces?
Gives shoes the ‘TUCKED-IN’ style of lace-ups with the ease of slip-ons

Easy Installation

Adjustable Tightness

One Size Fits All

Style with Comfort

Flexible Fit

Versatile

Washable & Reusable

Happiness Guaranteed
Need to ask something?
Always humans, never bots. The hands-down, sharpest and friendliest support team in the biz.
